


Introduction
- This is a 3-currency farming event (


 ).
). - Free quests will happen in 4 areas that are gated by escape progress, which depends on Master participation.
- In the rerun, an additional set of farming quests ("Basement" quests) will be available after the last round finishes.
- The rerun also has a few quality of life changes, such as adjusting the materials and currencies dropped from each team support quest, and adjustment to enemy classes in nodes.
Supporting Teams
- Assist the six teams in a grand jail breakout! Progress is determined by which teams Masters choose to support. Give your favorite team a boost by running your team's quest!
- Special Boost Items will give a base of +2 points to the supported team, and will award QP at the end of the round for each boost used.
- End of Round Awarded QP = [30,000 QP] x [Total Points Earned from Boost Items]
- Get bonus points (+3 instead of +2) for using a boost preferred by the team you support! See the table below for a list of which teams benefit most form which boost items.
- Difficulty also has an additional multiplier on boost points:
- Spoon: x1 (+2 or +3)
- Shovel: x3 (+6 or +9)
- Drill: x5 (+10 or +15)
- Use all boosts during the race! Unused Boosts can be exchanged for 10,000 QP at the end of the event. This means every unused boost is a loss of 50,000-440,000 QP.
- The top 3 placing teams will have their associated Ascension Material rewards distributed to all Masters at the end of each round. A list of rewards for each team for each round can be found here.
| Item | Bonus | Team Boost |
Star Spoon | Team Helena / Team Nobu  | |
Calorie Meat | Team Altria&Nero / Team Nitocris  | |
NP Hammer | Team Fran / Team Raikou  |
General Tips:
- As with the first part, save serious apple usage for the post-Main Quest section. The best farming quests are the "Basement" quests, which open after the last round finishes.
- Remember to stack currency drop bonus by bringing multiple Event Bonus Servants! They will increase drops for all event currencies.
- Event Bonus CEs from both Part 1 and Part 2 of the event's original run will provide drop bonuses as well.
- Buy
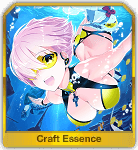 Dive to Blue ASAP from the Event Shop; this will help speed up the farming process for all currencies. This CE also provides a hybrid Arts + NP Damage + 50% Starting NP Gauge, making it a decent CE for general use. Its HP/ATK bonus is evenly split, however, so it is not as ideal as some pure ATK bonus CEs.
Free Quests at a Glance
| Quest | Event Items | Enemy Class | CE / Material Drops | Boost Item / Bonus CE |
A1: Altria & Nero - Drill | ||||
A1: Fran - Drill | ||||
A1: Raikou - Drill | ||||
A1: Helena - Drill | ||||
A1: Nobu - Drill | ||||
A1: Nitocris - Drill |
| Quest | Event Items | Enemy Class | CE / Material Drops | Bonus CE |
A2: Altria & Nero - Drill | ||||
A2: Fran - Drill | ||||
A2: Raikou - Drill | ||||
A2: Helena - Drill | ||||
A2: Nobu - Drill | ||||
A2: Nitocris - Drill |
| Quest | Event Items | Enemy Class | CE / Material Drops | Bonus CE |
A3: Altria & Nero - Drill | ||||
A3: Fran - Drill | ||||
A3: Raikou - Drill | ||||
A3: Helena - Drill | ||||
A3: Nobu - Drill | ||||
A3: Nitocris - Drill |
| Quest | Event Items | Enemy Class | CE / Material Drops | Bonus CE |
A4: Nero&Altria - Drill | ||||
A4: Fran - Drill | ||||
A4: Raikou - Drill | ||||
A4: Helena - Drill | ||||
A4: Nobu - Drill | ||||
A4: Nitocris - Drill |
| Quest | Event Items | Enemy Class | CE / Material Drops | Bonus CE |
 A1: Basement - Dynamite | ||||
A2: Basement - Dynamite | ||||
A3: Basement - Dynamite | ||||
A4: Basement - Dynamite |
| Event Bonus | Class | Servants |
| Name | How to Obtain | Event Bonus |
Dive to Blue 5★ | Event Shop (x4) Quest Drop (Low chance) | |
Summer Little 5★ | Event Gacha (Part 1) | |
White Cruising 4★ | Event Gacha (Part 1) | |
Sugar Vacation 3★ | Event Gacha (Part 1) Friend Point Gacha | |
Midsummer Moment 5★ | Event Gacha | |
King Joker Jack 4★ | Event Gacha | |
Chaldea Beach Volleyball 3★ | Event Gacha Friend Point Gacha |
| # | Quest | Notes | Event Drops |
| 3 | Escape 1 | Two waves, the first wave with 3 low-HP Lancer enemies, the second with a single Rider boss (42k HP). | None |
| 4a | A1: Altria & Nero - Drill | Goal: Run either Altria & Nero or Nobu's node for Single Candy. Both have similar currency drop rates; they differ in enemy comp and Ascension Mat drops. Ascension Mats: Bonus CEs: | Primary: |
| 4b | A1: Nobu - Drill | Ascension Mats: Bonus CEs: | Primary: |
| 5 | Escape 1 Results | Two waves of low HP lancer mobs (Bonus CEs: | Primary: |
| # | Quest | Notes | Event Drops |
| 6 | Escape 2 | Story only. | None |
| 7a | A2: Altria & Nero - Drill | Goal: If Single Candies are still needed, run Altria & Nero or Raikou's node. Ascension Mats: Bonus CEs: | Primary: |
| 7b | A2: Raikou - Drill | Ascension Mats: Bonus CEs: | Primary: |
| 7c | A2: Fran - Drill | Goal: Ascension Mats: Bonus CEs: | Primary: |
| 7d | A2: Nobu - Drill | Ascension Mats: Bonus CEs: | Primary: |
| 8 | Escape 2 Results | Single Avenger boss (83k HP). Bonus CEs: | Primary: |
| 9 | Assassination 1 | Part 1: Single Lancer boss (65k HP). Part 2: Two waves of <16k HP Lancer mobs and a break bar Assassin boss (27k, 16k HP). Bonus CEs: | Primary: |
| 10 | Assassination 2 | Story only. | None |
| # | Quest | Notes | Event Drops |
| 11 | Escape 3 | Both parts are story only. | None |
| 12a | A3: Fran - Drill | Goal: If Single Candies are still needed, run Fran or Raikou's node. Ascension Mats: Bonus CEs: | Primary: |
| 12b | A3: Raikou - Drill | Ascension Mats: Bonus CEs: | Primary: |
| 12c | A3: Helena - Drill | Goal: If Instant Noodles are still needed, run Helena or Nitocris's node. Ascension Mats: Bonus CEs: | Primary: |
| 12d | A3: Nitocris - Drill | Ascension Mats: Bonus CEs: | Primary: |
| 12e | A3: Altria & Nero - Drill | Goal: Run either Altria & Nero or Nobu's node for Connacht Coins. Both have similar currency drop rates; they differ in enemy comp and Ascension Mat drops. Ascension Mats: Bonus CEs: | Primary: |
| 12f | A3: Nobu - Drill | Ascension Mats: Bonus CEs: | Primary: |
| 13 | Escape 3 Results (1/3) | Single Assassin boss (73k HP). Bonus CEs: | Primary: |
| 14 | Escape 3 Results (2/3) | Single Berserker boss (83k HP). Bonus CEs: | Primary: |
| 15 | Escape 3 Results (3/3) | Assassin with Break Bar (51k, 44k HP). Bonus CEs: | Primary: |
| # | Quest | Notes | Event Drops |
| 16 | Escape 4 | Story only. | None |
| 17d | A4: Helena - Drill | Goal: If Single Candies are still needed, run Helena or Nitocris's node. Ascension Mats: Bonus CEs: | Primary: |
| 17f | A4: Nitocris - Drill | Ascension Mats: Bonus CEs: | Primary: |
| 17a | A4: Nero&Altria - Drill | Goal: If Instant Noodles are still needed, run Altria & Nero or Raikou's node. Ascension Mats: Bonus CEs: | Primary: |
| 17c | A4: Raikou - Drill | Ascension Mats: Bonus CEs: | Primary: |
| 17b | A4: Fran - Drill | Goal: If Connacht Coins are still needed, run Fran or Nobu's node. Ascension Mats: Bonus CEs: | Primary: |
| 17e | A4: Nobu - Drill | Ascension Mats: Bonus CEs: | Primary: |
| 18 | Escape 4 Results | Part 1: Two waves of <14k HP Lancer mobs and two Rider bosses with Break Bars (24k, 18k HP and 26k, 23k HP). Part 2: Story only. Bonus CEs: | Primary: Secondary: |
| 19 | Final Area | Story only. | None |
| 20 | Full Throttle | Story only. | None |
| 21 | Closing Ceremony | Part 1: Story only. Part 2: Two waves, wave 1 with an Archer boss (26k HP), and wave 2 with a Rider boss with Break Bar (32k, 16k HP). Ishtar (Rider) | None |
| # | Quest | Notes | Event Drops |
| 22 | A1: Basement - Spoon | Clear once for clear reward. Ascension Mats: Bonus CEs: | Primary: |
| 23 | A1: Basement - Shovel | Clear once for clear reward. Ascension Mats: Bonus CEs: | Primary: |
| 24 | A1: Basement - Drill | Clear once for clear reward. Ascension Mats: Bonus CEs: | Primary: |
| 25 | A1: Basement - Dynamite | Clear once. Best single-currency farming location for Single Candy. Ascension Mats: Bonus CEs: | Primary: |
| 26 | A2: Basement - Spoon | Clear once for clear reward. Ascension Mats: Bonus CEs: | Primary: |
| 27 | A2: Basement - Shovel | Clear once for clear reward. Ascension Mats: Bonus CEs: | Primary: |
| 28 | A2: Basement - Drill | Clear once for clear reward. Ascension Mats: Bonus CEs: | Primary: |
| 29 | A2: Basement - Dynamite | Clear once. Best single-currency farming location for Instant Noodles. Ascension Mats: Bonus CEs: | Primary: |
| 30 | A3: Basement - Spoon | Clear once for clear reward. Ascension Mats: Bonus CEs: | Primary: |
| 31 | A3: Basement - Shovel | Clear once for clear reward. Ascension Mats: Bonus CEs: | Primary: |
| 32 | A3: Basement - Drill | Clear once for clear reward. Ascension Mats: Bonus CEs: | Primary: |
| 33 | A3: Basement - Dynamite | Clear once. Best single-currency farming location for Connacht Coin. Ascension Mats: Bonus CEs: | Primary: |
| 34 | A4: Basement - Spoon | Clear once for clear reward. Ascension Mats: Bonus CEs: | Primary: |
| 35 | A4: Basement - Shovel | Clear once for clear reward. Ascension Mats: Bonus CEs: | Primary: |
| 36 | A4: Basement - Drill | Clear once for clear reward. Ascension Mats: Bonus CEs: | Primary: |
| 37 | A4: Basement - Dynamite | Farm this location. Best overall AP return; drops all three currencies. Farming this until only one currency remains and then clearing the rest of the leftover currency in its corresponding single-currency farming node ends up being most AP efficient in most scenarios. Remember to bring Event Bonus Servants to maximize drops for all currencies! Ascension Mats: Bonus CEs: | Primary: |