
Event Guides


Quest Information


Introduction
- This guide is a summary of all the farming information for Part 1 of the Summer 2018 Event
- The main objective for this event is complete the Main Quest to access Part 2 of the event, and to buy all 4 Ascension Items for Scathach (Assassin) from the Event Shop.
- Unlocking Scathach (Assassin) requires completion of the Main Quest of Part 2, and additional copies of her can be acquired in Part 2 as well.
- Masters are highly advised to finish all Part 1 Event Farming before Part 2 is unlocked on the 19th as Part 2 has different ideal Servant and CE combinations.
- Buy the Event CEs from the Event Shop only after the Main Quest is completed as unlocking higher difficulties earlier is more rewarding.
- Only returning Masters from last year should MLB Summertime Mistress.
- Finish farming for Lumber / Stone / Iron first as their ideal farming locations all drop Food / Water.
Event period expires in:
Automatic Efficiency Calculator
Note for Masters from last year
Fielding an MLB Summertime Mistress of your own is always more efficient than fielding a non-MLB gacha CE while farming Lumber, Stone or Iron.
Thus for a (very slightly, the difference is only 1-2 runs) more optimal route, Masters with an MLB Summertime Mistress should only enter 4 non-MLB copies for, say, Shining Goddess in the calculator even if they have 5 copies.
An MLB gacha CE is still always better.
Enter in the total currency you need from the shop below.
Drop Bonus Table
| Class | Event CE | Event Bonus (MLB) |
Storm Difficulty Farming Quests
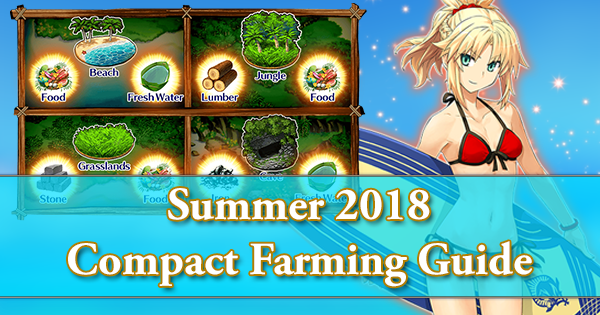
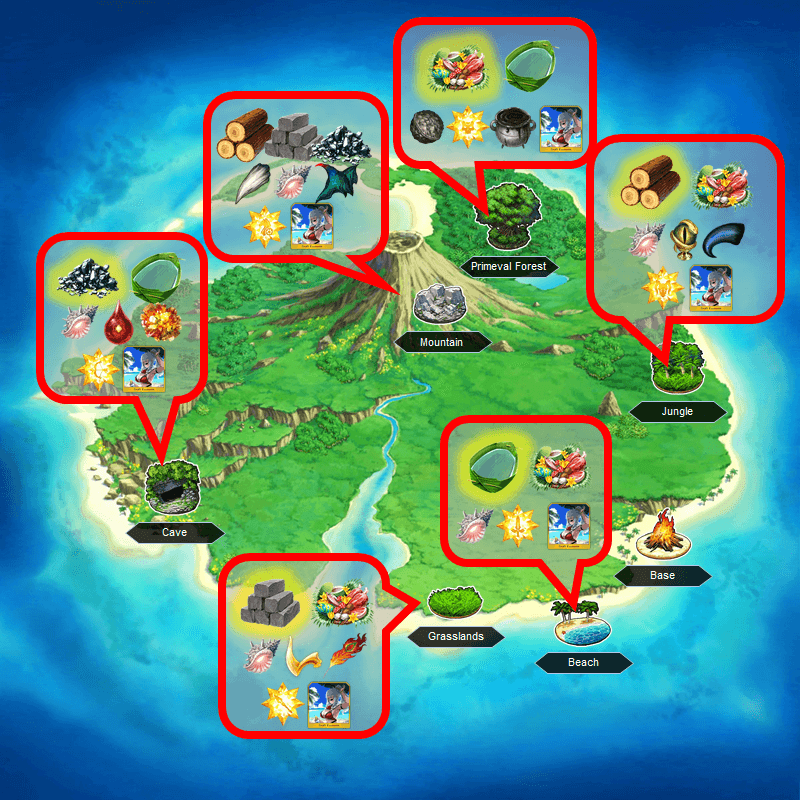
Farming Locations
Once you clear Chapter 8, these are the best Event resource farming locations.
| Resource | Area | Notes | Enemy Classes |
Beach 6 | Drops | ||
Primeval Forest 6 | Drops | Boss: | |
Jungle 6 | Drops Optimal with 5+ | Boss: | |
Grasslands 6 | Drops Optimal with 5+ | Boss: | |
Cave 6 | Drops Optimal with 5+ | Boss: | |
Mountain 6 | Drops Optimal with +1~4 | Boss: |
Servant Recommendations
- Not all Locations can be farmed easily with full bonus. The Cave area in particular can be slow to farm with full Event Bonus as Lancers cannot be used without losing out on an Event bonus drop.
- Either way, Masters can make a trade-off of their own whether they should prioritize full bonus or speed.
- Masters with a lot of Event CEs should especially consider dropping 1 bonus for a more ideal farming Servant.
- The below recommendations are mainly Recommended Servants to borrow or Servants that are particularly effective due to a trait bonus (Rama, Proto Cu, Martha, etc.)
- If the Drop Rates from the original run are similar, then there are no outstanding Free Quests worth farming after clearing the Event Shop, especially with a lottery on the horizon.
| Event Drop | Area | Advice / Suggested Servants |
Class |
Beach |
Drops: |
||
Primeval Forest |
Drops: |
Boss: |
|
Jungle |
Drops: |
Boss: |
|
Grasslands |
Drops: |
Boss: |
|
Cave |
Drops: |
Boss: |
|
Mountain |
Drops: |
Boss: |
|
Drop Rate Calculator
Estimated Total Drops
 |
 |
 |
 |
 |
|
|---|---|---|---|---|---|
| Beach 4 | - | - | - | - | - |
| Beach 5 | - | - | - | - | - |
| Beach 6 | - | - | - | - | - |
| Grasslands 4 | - | - | - | - | - |
| Grasslands 5 | - | - | - | - | - |
| Grasslands 6 | - | - | - | - | - |
| Cave 4 | - | - | - | - | - |
| Cave 5 | - | - | - | - | - |
| Cave 6 | - | - | - | - | - |
| Jungle 4 | - | - | - | - | - |
| Jungle 5 | - | - | - | - | - |
| Jungle 6 | - | - | - | - | - |
| Mountain 4 | - | - | - | - | - |
| Mountain 5 | - | - | - | - | - |
| Mountain 6 | - | - | - | - | - |
| Forest 4 | - | - | - | - | - |
| Forest 5 | - | - | - | - | - |
| Forest 6 | - | - | - | - | - |
Note: Drop Rates estimates are sourced from the datamine from Kazemai.