Enemy Layout
Boss Statistics
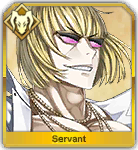
| Jack the Ripper | ||
 |
HP | 156,044 |
| LVL | 80 | |
| Class | ||
| NP Bar |  | |
| NP Type | ST | |
| Actions | Up to 3 per turn | |
| Traits | Humanoid, Servant, Weak to Enuma Elish, Heaven or Earth | |
| Skills | Start of wave: Casts Buff Block on all front line Servants (3 times). | |
| Upon Death: Buffs allies including sub-members with HP regen (15,000 per turn). Removable. | ||
| Grants self Evasion and Quick Up for 1 turn. | ||
| Removes buffs from one enemy and reduces their critical hit damage for 3 turns. | ||
| Recovers one ally's HP. | ||
| NP Effect | High damage to a single target that ignores defense, with bonus damage to Female targets. |
| Medea | ||
 |
HP | 207,432 |
| LVL | 70 | |
| Class | ||
| NP Bar |  | |
| NP Type | ST | |
| Actions | Up to 2 per turn | |
| Traits | Humanoid, Servant, Weak to Enuma Elish, Heaven or Earth | |
| Skills | On first turn: Inflicts poison (1,000 damage per turn for 10 turns). Can cast more than once. Removable. | |
| Upon Death: Buffs allies including sub-members with Defense up (50%). Cannot be removed. | ||
| Charges own NP gauge by 2. | ||
| Recovers own HP. | ||
| Clears debuffs from one ally and charges their NP gauge by 1 (unconfirmed). | ||
| NP Effect | Damage to a single target that removes buffs. |
| Altria Pendragon (Lancer Alter) | ||
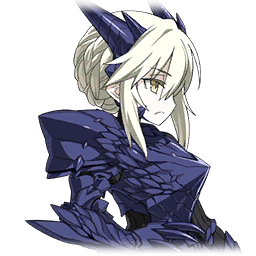 |
HP | 235,220 |
| LVL | 80 | |
| Class | ||
| NP Bar |  | |
| NP Type | AoE | |
| Actions | Up to 3 per turn | |
| Traits | Arthur, Dragon, Heaven or Earth, King, Humanoid, Riding, Saberface, Servant, Weak to Enuma Elish | |
| Passive | Increase debuff resistance by 17.5%. | |
| Skills | Upon Death: Buffs allies including sub-members with NP charge regen (increase NP charge by an extra 1 per turn). Cannot be removed. | |
| Increase own Buster performance for 1 turn. | ||
| Increase own Critical Hit Damage and Critical Hit Rate for 1 turn. | ||
| Increase party's attack for 3 turns. | ||
| NP Effect | Deals damage to all enemies, ignoring defense. Has a chance to NP Seal all enemies for 1 turn, and curses all enemies for 5 turns. |
| Amakusa Shirou | ||
 |
HP | 168,336 |
| LVL | 80 | |
| Class | ||
| NP Bar |  | |
| NP Type | AoE | |
| Actions | Up to 3 per turn | |
| Traits | Humanoid, Servant, Weak to Enuma Elish | |
| Passive | Increase debuff resistance by 20%. | |
| Skills | Upon Entry: Inflicts debuff - Reduce Max HP of all front line Servants by 2,000 (10 turns). Removable. He also can continue using this skill during his turns. The effect stacks. Frequently uses this skill. | |
| Upon Death: Buffs allies including sub-members with increased Critical rate. Removable. | ||
| Increase own critical hit chance for 3 turns. | ||
| Charge own NP gauge by 1. | ||
| Chance to stun one enemy Servant for 1 turn. | ||
| NP Effect | Removes all buffs from all enemies before dealing a large amount of damage to all enemies. Inflicts critical damage down on all enemies for 1 turn. |
| Ozymandias | ||
 |
HP | 274,475 |
| LVL | 75 | |
| Class | ||
| NP Bar |  | |
| NP Type | ST | |
| Actions | Up to 3 per turn | |
| Traits | Humanoid, King, Servant, Brynhild's Beloved, Heaven or Earth, Divine, Riding, Weak to Enuma Elish | |
| Passive | Increase debuff resistance by 17.5%. | |
| Skills | Upon Entry: Recovers own HP by 3400 (no effect since his health is full upon entry). Increases own Attack and Defense by 44% (5 turns). Removable. | |
| Upon Death: Buffs allies including sub-members with Sure Hit. Cannot be removed. | ||
| Charges all allies' NP gauge by 1 and increases their buff success rate for 40% for 3 turns. Frequently uses this skill. | ||
| Increase party's attack for 3 turns. | ||
| Recovers own HP by 3000, and a 60% chance to increase own attack and/or defense by 40% for 3 turns. | ||
| NP Effect | Deals high damage to one enemy, inflicting NP Seal for 1 turn and defense down for 3 turns. |
| Nero Claudius | ||
 |
HP | 446,614 |
| LVL | 80 | |
| Class | ||
| NP Bar |  | |
| NP Type | AoE | |
| Actions | Up to 3 per turn | |
| Traits | Humanoid, Servant, King, Riding, Roman, Saberface, Weak to Enuma Elish | |
| Passive | Increase debuff resistance by 15%. | |
| Skills | Upon Entry: Casts Guts on self (Recover 89,322 HP upon death, 3 times), increase own critical rate and critical strength. (Unremovable) | |
| Upon Death: Buffs allies including sub-members with Guts (either 10 times or unlimited). (Unremovable) | ||
| Recovers own HP by 3400, and a 60% chance to increase own attack and/or defense by 44% for 3 turns. Frequently uses this skill. | ||
| Recovers own HP by 2000, and increases own mental debuff resistance by 100%. | ||
| NP Effect | Deals high damage that ignores defense to all enemies. Additionally inflicts defense down for 1 turn. |
Introduction - Prototype Changes
- This encounter was the original version of the final battle. It was only available on the Japanese server for a short period, as the developers realized they overtuned it far too much and quickly nerfed it within 24 hours. While that decision is a bit controversial to this day, it did allow them the opportunity to showcase two versions of the fight in this Nero Fest.
- Still, even now, this fight is a lot easier than at the time of release. New Rank Ups & Interludes, powerful Support Servants, new CE and Command Code combinations....it's a lot more manageable.
- In terms of difficulty, this Challenge Quest should be easier to complete than the Da Vinci and First Hassan one, but that may depend on each Master's lineup.
- That does not make the fight a pushover though, it's fairly hard to solo, but given our new support options, blasting through the higher base HPs isn't that much more difficult than the nerfed version.
- By and large, the same strategies that worked for the nerfed version should still work, except they need to hit higher damage benchmarks/sustain.
Main Changes
- Overall: All Servants have a much higher health pool, making 1-turning them more difficult.
- Jack the Ripper: Healing/turn has been increased from 5,000 to 15,000, passively adding more health to chew through unless 3-turning.
- Nero Claudius: Accordingly has her Guts amount increased, but the main issue is that if Nero Claudius does not die last, she will grant all her allies infinite Guts (There are some reports floating about that it lasts for 10 times, feel free to, ah, experiment if you like).
- (Damage is unchanged as far as we could observe)
Overview
-
The fight hasn't changed much, the Overview and Team Recommendations section will thus be very similar, apart from a few changes based on the changes in version.
-
Note: It is possible to use 2 of the same Servants for this one.
-
Once more the enemy Servants come with additional skills, often apply buffs or debuffs on entering the battlefield and most importantly, buff all remaining enemies with various nasty effects when they perish.
-
Jack is generally the first target to take out. Her HP regeneration buff on death is substantial now, but the least problematic on death buff and her short charge bar as well as ability to remove buffs are annoying to plan around.
-
Medea does little damage even with her Rule-Breaker spam, but the loss of buffs from Rule-Breaker is disruptive at times. Her defense buff on death is absolutely a problem though especially with fastly increased HP amounts, so she is often kept alive until the fight is nearly over.
-
Altria has no special gimmicks at all until she dies. She then increases her allies’s NP gauge by 1 at the end of every turn which turns all enemies into NP spamming Monsters especially given how many of them have NP charge skills of their own.
-
Amakusa enters the field after the first kill and should be dealt with as soon as possible. His Max HP reduction spam becomes problematic if left unchecked. His NP can be stalled but requires specific comps to survive, so it’s easier to simply get rid of him. He buffs the crit rate of all remaining Servants upon defeat.
-
Ozymandias enters with an automatic Imperial Privilege cast. Killing him will grant all the remaining Servants Sure Hit, which is troublesome for Servants relying on Evasion. Ozymandias is very sturdy due to his defensive buffs and additional Imperial Privilege casts can quickly make his defense incredibly high. Note: He loves to spam his NP Charge skill, so expect many NPs once he enters the field.
-
Nero enters the fray last with boosted critical chance, critical damage and her Thrice-Setting Sun active (reviving her with 89.3k HP each time). With 3 stacks of Guts and a proclivity to abuse her Imperial Privilege skill, Nero is very sturdy. On death, Nero buffs all remaining Servants with infinite Guts, so always leave her for last!
-
-
The fight begins with a 3-time buff negation effect on the frontline. It will not expire until 3 buffs are absorbed, but it can be cleansed (or prevented with a CE). Countering this devastating debuff is crucial to a good start.
-
Imperial Privilege is especially a pain in this fight. With its random chance to grant buffs, both Nero and Ozymandias can potentially be nearly impervious to normal card damage.
-
Because of the massive amount of ways the enemy can boost their different NP bars, a quick clear speed is crucial and stalling this fight is very hard to pull off.
-
The order of killing will depend on the strategy (is it AoE or ST NP-based, does it rely on Evasion and what tools are available in your roster?). Generally, the standard order is:
-
Jack → Amakusa (Priority) →(Either order: Ozymandias→Altria)→Nero Guts(3x) → Medea → Nero.
-
Alternative order to reduce Nero's turns and profit from predictable ST NPs:
-
Jack → Amakusa (Priority) → Altria → Nero Guts (3x) → (Either order: Medea → Ozymandias) → Nero
Team Recommendations
-
With so many different classes and the hard to counter Ruler class, Berserker Servants shine in this Quest. Current offensive Extra Class Servants and AoE Archers also perform well.
-
Regardless, whomever you use as your main DPS should have a limit-broken Divine Three-Legged Race CE equipped.
-
Due to the potential for high % defense buffs from Imperial Privilege and Medea, Buster-oriented Servants can still perform well as the bonus damage from Buster chains ignores defense buffs. Alternatively, bringing either Ignore Defense or a form of buff removal to strip Ozymandias or Nero from the protection of their precious (non-Medea) defense buffs.
-
Buff Removal in general is quite strong for steady compositions, as Amakusa's Critical buff and Jack's HP Regen are removable.
-
To counteract the initial buff absorption debuff, either bring debuff cleansing from Servants, use a debuff blocking-CE (See Table) or resort to cleansing the main (borrowed) DPS with the Atlas Academy Uniform. Alternatively, bring Servants with a lot of buffs in their kit to try to remove the buffs with their least important team buffs.
-
The amount of damage that needs to be done per target is now fairly substantial. Unlike the nerfed version, striking a balance between damage output and NP Gauge is ideal.
-
ST Servants can generally deal enough damage and would prefer additional NP Charging Support.
-
AoE Servants might need more damage especially at lower NP levels and thus need more high value damage support.
-
In order to protect the main DPS, fill the team with the best defensive measures available. Taunts are incredibly powerful for both their protection and reducing the randomness in this fight.
-
(Teamwide) Hard Survival is also more valuable now that the threat of receiving enemy NPs is a lot higher.
-
Last Stand Servants work slightly different with the Sure Hit buff in effect. A Last Stand Servant with the Event CE and a guts in their kit can do some terrific damage to Nero at the end.
-
In terms of Mystic Codes, the Atlas Academy Uniform is very useful to negate the initial buff absorption debuff and its cooldown reduction/invincibility are incredible for keeping Berserkers alive and their kill potential high.
-
However, there are multiple options that work here: The Chaldea Combat Uniform has both its Stun and Order Change for strategic purposes, The Mystic Code Chaldea is great for keeping the Berserkers healthy, the Mage Association Uniform can top off NP gauges and retry card draws for speedier kills and finally the Anniversary Blonde Mystic Code is stellar for big Buster critting and providing a Guts to close out the final battle against Nero herself.
Specific Servant Advice
-
There are 2 main Berserker routes to go with:
-
A route focused on strategy and removing each Servant one at a time with ST NPs and basic attacks. For this route, Kintoki provides the best damage and defense-piercing capabilities but will need to be babied with taunts/defense up. Cu Alter meanwhile does less damage but is a lot more sturdy until Ozymandias falls. Ibaraki, Berserker of El Dorado, and Heracles are both budget versions for this strategy.
-
Raikou follows an AoE route where with additional offensive buffs she can remove an entire wave of Servants at once. The fight needs to be finished fast though as both Medea and Altria apply truly dangerous buffs on death. This is easier to pull off with Command Seals, Waver/Merlin and/or high level support skills. Lancelot and Spartacus (Ignore Defense) are budget version in combination with heavy support.
-
Sherlock is a great option for a slow and steady approach. With many of the key challenges at the end of the fight revolving around Defense buffs, Sherlock can enable different kill orders and harm Nero no matter what. Not only can he function as the main DPS if Masters so choose, he makes for a great support for AoE Servants who are often impeded by the Imperial Privilege buffs (and Medea's buff).
-
Jeanne d’Arc (Alter) can perform really well here too, especially when dealing with Amakusa. She will need to rely on her Critical skills to pull enough damage what with the higher base HP.
-
Fielding an Amakusa of your own is possible too, although make sure to bring additional damage buffs to be able to clear the Servants fast enough. His buff removal is even more valuable now, as he can remove both Jack's and his opposing version's on death buffs.
-
Gilgamesh excels in Servant-based fights like this, especially with a final Saber boss. Ishtar and Tesla are very powerful alternatives too, while Arjuna (with his latest Interlude!) isn't half bad either. EMIYA (Alter) and EMIYA are also a bit of a darkhorse option against Nero, with their Defense-ignoring NPs.
-
For cleansing the initial debuff, Medea (Lily) and Saint Martha (Rider) are powerful options. They can even be swapped out afterwards if necessary with Order Change.
-
Merlin is incredibly powerful now that the enemy Servants are more likely to launch their NP and now that they need to receive more damage. He will make the fight a lot easier, and greatly helps those with middling damage to still have great kill potential.
-
Fielding a debuff-blocking CE is a great choice for initial frontline supports provided they are available, see the table for the current options.
-
The buff absorption debuff can also be cleared with Servants who have multiple team buffs. For example, Gilgamesh (Caster) has access to 3 teamwide buffs, while Waver, Merlin and Caesar all have 2 team buffs and 1 targetable buff.
-
Fill the backline and frontline with the type of buffs the Main DPS needs. Trying to field multiple DPS Servants is generally counterproductive with access to an Event CE. NP gauge giving Servants like Waver, Merlin and Shakespeare are incredible here.
-
CEs that buff after death or affect the Main DPS are great picks. Taunt CEs and other protection CEs can also buy valuable time.
-
Among taunt Servants, Chevalier d'Eon excels at the early stage of this fight, being able to cleanse and resist incoming debuffs.
-
With Sure-Hit on the enemy, Nero Claudius (Saber) becomes a very strong Servant to field for a last stand. Her NP also pierces defense.
Soloable for New Masters?
Technically, sure, but mainly for more experienced Masters. There is a lot of RNG that need to go right; enemy actions, Imperial Privilege Defense Up procs failures, card draws, etc. Getting that all to line up would be very time consuming.
- When soloing, Masters field lvl 1+ Servants with a Taunt (generally Georgios and Leonidas) to draw fire for 2 turns (one at a time) and then leave the borrowed maxed Servant on their own. Masters can extend this Taunt chain by bringing more Taunt Servants, at the cost of more random card draws.
- Cu Chulainn (Alter) (quelle surprise) is once again the main Servant to be able to do it most "easily".
- Thing is, due to the higher base HPs, Grailed Servants (and NP Upgrades) are pretty much required.
- In addition, Masters need to be clever about removing Jack's Buff Block; from using a level 1 BB, to Arash's bond CE, fielding in the backline or using the Atlas Academy Uniform.
- Typically, wait for the poison before cleansing and using his Evasion, and keep an eye on when to kill Ozymandias as he will bestow Sure Hit on death.
- Typically, the designated kill order during solo runs is: Jack -> Amakusa -> Altria (Lancer Alter) -> Nero Guts -> Medea -> Ozymandias -> Nero.
- Command Seals can be used to recharge NPs/HP, but you better be sure you can close the encounter!
Video Links
Note that these videos are not affiliated with GamePress, but showcase some lineups that are effective in clearing the final challenge. These can serve as a good reference for how to rotate skills during this quest or simply to have a look at the encounter before diving in.
- (Overkill Composition, but it is a great, slow refresher of all the mechanics) Amakusa/Waver/Jeanne/Merlin(Swap) Sustain composition
- (Bronze Composition, showcases power of Taunts and Ignore Defense) Double Spartacus (lvl 65, NP5) with Expensive CEs (2x Poster Girl + Arash bond CE and Ox-Demon King)
- (3-turn) Gilgamesh (lvl 100, NP5) /Waver/Merlin/Waver with Chaldea Combat Uniform
- (3-turn, yandere) Kiyohime (lvl 100, NP5) Merlin/Sherlock/Merlin with Chaldea Combat Uniform and 3 Command Seals
- Reminder: These solo videos require retrying for the RNG to line up.
- Cu Chulainn (Alter) Solo (lvl 100, NP1, 10/10/10) with lvl 1 BB (Taunt CE) + lvl 1 Mash (London+) and Chaldea Mystic Code
- Cu Chulainn (Alter) Solo (lvl 100, NP2, 10/10/10) with Atlas Academy Uniform
- Cu Chulainn (Alter) Solo (lvl 100, NP2, 10/10/10) with Arash Bond CE and Atlas Academy Uniform
- Heracles Solo (lvl 100, NP3, 10/10/10) with Atlas Academy Uniform
- (Amusing, not really replicable) Nero Claudius Solo (lvl 100, NP5, 10/10/10) + Arash Bond CE + Command Seal + Atlas Academy Uniform

