GamePress

Event Quests

Submit Feedback or Error
Event Quests
Table of Contents

Quests

Search...

Imaginary Scramble
Imaginary Scramble - Nautilus
Quest
Act Four: The Unthinkable Dissolving (2/3)
Act Four: The Unthinkable Dissolving (Part 3/3) (1/6)
Act Four: The Unthinkable Dissolving (Part 3/3) (2/6)
Act Four: The Unthinkable Dissolving (Part 3/3) (3/6)
Act Four: The Unthinkable Dissolving (Part 3/3) (4/6)
Act Four: The Unthinkable Dissolving (Part 3/3) (5/6)
Act Four: The Unthinkable Dissolving (Part 3/3) (6/6)
Idle Talk 3
Act Five: The Bottom of the Sea Blooming and Yielding (Part 1/2) (1/3)
Act Five: The Bottom of the Sea Blooming and Yielding (Part 1/2) (2/3)
Act Five: The Bottom of the Sea Blooming and Yielding (Part 1/2) (3/3)
Act Five: The Bottom of the Sea Blooming and Yielding (Part 2/2) (1/5)
Act Five: The Bottom of the Sea Blooming and Yielding (Part 2/2) (2/5)
Act Five: The Bottom of the Sea Blooming and Yielding (Part 2/2) (3/5)
Act Five: The Bottom of the Sea Blooming and Yielding (Part 2/2) (4/5)
Act Five: The Bottom of the Sea Blooming and Yielding (Part 2/2) (5/5)
Final Act: Firing a Salute to the Abyss
Idle Talk 4
Extra Act: Sea of the Foreign Deities (1/5)
Extra Act: Sea of the Foreign Deities (2/5)
Extra Act: Sea of the Foreign Deities (3/5)
Extra Act: Sea of the Foreign Deities (4/5)
Extra Act: Sea of the Foreign Deities (5/5)
Fade-Out: Chaotic Yet Good
Imaginary Scramble - Exploration - Abyss
Quest
[Powerful Enemy] Abyss - Attack Multi-Colored Enemy (Imaginary Number: α)
[Powerful Enemy] Abyss - Attack Surging Flame Enemy (Imaginary Number: 𝛿)
[Powerful Enemy] Abyss - Attack Dancing Enemy (Imaginary Number: ζ)
[Powerful Enemy] Abyss - Attack Towering Enemy (Imaginary Number: ε)
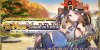
GUDAGUDA Yamataikoku 2022
GUDAGUDA Yamataikoku - Settlement Base
Quest
Gather Material - Collect material within the settlement
Gather Material - Collect material near the river
Gather Material - Collect material near the field
[High Difficulty] Open the Demonic Heavens
Section 1: The Future, From the Distance (2/4)
Section 1: The Future, From the Distance (3/4)
Section 2: Visitors from Afar, To the Settled Lands (1/2)
Section 3: Separation, Rocked by the Waves of Time (1/2)
Section 4: Mountain Cherry Blossoms, Scatter Without a Trace (1/2)
Section 4: Mountain Cherry Blossoms, Scatter Without a Trace (2/2)
Section 5: At Midnight, Drenched by the Rain (1/3)
Section 5: At Midnight, Drenched by the Rain (2/3)
Section 5: At Midnight, Drenched by the Rain (3/3)
Section 6: Siblings, Killing Lovingly (1/2)
Section 7: Powerful Deity, A Day of Disaster (2/2)
Section 8: The Fierce and the Invincible, Under the Drizzling Rain (1/2)
Section 8: The Fierce and the Invincible, Under the Drizzling Rain (2/2)
Epilogue: The Queen, From Beyond
Super Ancient Rice Account GUDAGUDA Hani-Taikoku 2022
Origins of Rice Balls
The Gishiwajinden Musou
Sold Out! Rice Milling War!
Super Warring States Daiginjyo "Kagetoran, Zero"
A Yamataikoku Cop Story
The Uruk's Yamato's Cha's King
Rice Golem
GUDAGUDA Yamataikoku - Raid Quests
Quest
Ominous God "Flame Nobu" - Curse
Ominous God "Storm Nobu" - Evil
Ominous God "Dark Nobu" - Grudge
Ominous God "Storm Nobu" - Final Battle
Ominous God "Flame Nobu" - Grudge
Ominous God "Storm Nobu" - Curse
Ominous God "Berserk Nobu" - Evil
Ominous God "Light Nobu" - Final Battle
Ominous God "Earth Nobu" - Evil
Ominous God "Storm Nobu" - Grudge
Ominous God "Berserk Nobu" - Curse
Ominous God "Dark Nobu" - Final Battle
Ominous God "Earth Nobu" - Curse
Ominous God "Light Nobu" - Evil
Ominous God "Berserk Nobu" - Grudge
Ominous God "Berserk Nobu" - Final Battle
Ominous God "Earth Nobu" - Grudge
Ominous God "Light Nobu" - Curse
Ominous God "Water Nobu" - Evil
Ominous God "Light Nobu" - Grudge
God of Disaster "Blaze Nobu" - Final Battle
Ominous God "Water Nobu" - Curse
Ominous God "Dark Nobu" - Evil
Ominous God "Water Nobu" - Final Battle
Ominous God "Flame Nobu" - Evil
Ominous God "Water Nobu" - Grudge
Ominous God "Dark Nobu" - Curse
Ominous God "Earth Nobu" - Final Battle
GUDAGUDA Yamataikoku - Haniwa Shrine
Quest
Gather Material - Collect material at the old forest
Section 1: The Future, From the Distance (4/4)
GUDAGUDA Yamataikoku - Giant Snake Shrine
Quest
Gather Material - Collect material at the Giant Snake Shrine
Section 2: Visitors from Afar, To the Settled Lands (2/2)
Section 3: Separation, Rocked by the Waves of Time (2/2) - Top Choice
Section 3: Separation, Rocked by the Waves of Time (2/2) - Bottom Choice
GUDAGUDA Yamataikoku - Dazzling Shrine
Quest
Gather Material - Collect material at the Dazzling Shrine
GUDAGUDA Yamataikoku - Former Yamataikoku Shrine
Quest
Gather Material - Collect material at the Former Yamataikoku Shrine
Section 6: Siblings, Killing Lovingly (2/2)
Section 7: Powerful Deity, A Day of Disaster (1/2)
Third Annual Yamataikoku Ultimate Queen Tournament
Farewell Yamataikoku, Until We Meet Again
GUDAGUDA Yamataikoku - Dark Shinsengumi Quarters
Quest
Gather Material - Collect material at the Dark Shinsengumi Headquarters
Section 9: The Obsession, Return to the Depths of the Earth (1/3)
Section 9: The Obsession, Return to the Depths of the Earth (2/3)
Section 9: The Obsession, Return to the Depths of the Earth (3/3)
Final Section: Between Light and Dark (1/2)
Final Section: Between Light and Dark (2/2)
GUDAGUDA Yamataikoku - Chaldea Gate
Quest
Prologue: The Haniwa, Beyond the Light (1/2)
Section 1: The Future, From the Distance (1/4)
Revival: Tokugawa Kaiten Labyrinth
Revival: Tokugawa Kaiten Labyrinth - Prologue
Quest
Prologue (1/3) (Revival)
Prologue (2/3) (Revival)
Prologue (3/3) (Main Interlude)
Prologue (3/3) (Revival)
Revival: Tokugawa Kaiten Labyrinth - Outside
Quest
Act Eight: The End of Tokugawa (1/2) (Revival)
Act Eight: The End of Tokugawa (2/2) (Revival)
Revival: Tokugawa Kaiten Labyrinth - 1st Floor
Quest
Cold Corridor (1/2) (Revival)
Cold Corridor (1/2) (Main Interlude)
Cold Corridor (2/2) (Revival)
Cold Corridor (2/2) (Main Interlude)
Act One: Tokugawa's Invitation (1/2) (Revival)
Act One: Tokugawa's Invitation (2/2) (Revival)
Act One: Tokugawa's Invitation (2/2) (Main Interlude)
Act Two: The Audience, Part One (Revival)
Act Two: The Audience, Part One (Main Interlude)
Act Two: The Audience, Extra (Revival)
Tanuki Room (Revival)
Tanuki Room (Main Interlude)
Act Two: The Audience, Part Two (Revival)
Act Two: The Audience, Part Three (Revival)
Act Two: The Audience, Part Four (Revival)
Act Two: The Audience, Part Four (Main Interlude)
Loud Corridor (Revival)
Loud Corridor (Main Interlude)
Interlude: The Truth of Materials, Part One (Revival)
Tiger Room (Revival)
Tiger Room (Main Interlude)
Interlude: The Truth of Materials, Part Two (Main Interlude)
Interlude: The Truth of Materials, Part Two (Revival)
Interlude: The Truth of Materials, Part Three (Revival)
Interlude: The Truth of Materials, Part Three (Main Interlude)
Fox Room (Revival)
Fox Room (Main Interlude)
Deer Room (Revival)
Deer Room (Main Interlude)
Sheep Room (Revival)
Sheep Room (Main Interlude)
Beat-Up Corridor (3/3) (Revival)
Beat-Up Corridor (3/3) (Main Interlude)
Cow Room (Revival)
Cow Room (Main Interlude)
Quiet Corridor (4/4) (Revival)
Quiet Corridor (4/4) (Main Interlude)
Stagnant Corridor (3/3) (Revival)
Stagnant Corridor (3/3) (Main Interlude)
Wolf Room (Revival)
Wolf Room (Main Interlude)
Eerie Corridor (3/3) (Revival)
Eerie Corridor (3/3) (Main Interlude)
Chilling Corridor (4/4) (Revival)
Chilling Corridor (4/4) (Main Interlude)
Epilogue (1/2) (Revival)
Terrifying Corridor (3/3) (Revival)
Terrifying Corridor (3/3) (Main Interlude)
Epilogue (2/2) (Revival)
Epilogue (2/2) (Main Interlude)
Snake Room (Revival)
Snake Room (Main Interlude)
Chicken Room (Revival)
Chicken Room (Main Interlude)
Weasel Room (Revival)
Weasel Room (Main Interlude)
Goldfish Room (Revival)
Goldfish Room (Main Interlude)
Boar Room (Revival)
Boar Room (Main Interlude)
Monkey Room (Revival)
Monkey Room (Main Interlude)
Rabbit Room (Revival)
Rabbit Room (Main Interlude)
Bat Room (Revival)
Bat Room (Main Interlude)
Mole Room (Revival)
Mole Room (Main Interlude)
Mosquito Room (Revival)
Mosquito Room (Main Interlude)
Dragon Room (Revival)
Dragon Room (Main Interlude)
[Ultra High Difficulty] Who Will Win the Affection? (Revival)
Revival: Tokugawa Kaiten Labyrinth - 2nd Floor
Quest
Procuring Tools: Aurora Room (Underground) (Revival)
Act Three: Path of Insincerity, Part One (Revival)
Act Three: Path of Insincerity, Part Two (Revival)
Act Three: Path of Insincerity, Part Two (Main Interlude)
Act Three: Path of Insincerity, Part Three (Revival)
Act Three: Path of Insincerity, Extra (Revival)
Act Three: Path of Insincerity, Part Four (Main Interlude)
Act Three: Path of Insincerity, Part Four (Revival)
Sitting Room with Treasure (3/3) (Revival)
Sitting Room with Treasure (3/3) (Main Interlude)
Road Block Sitting Room (2/2) (Revival)
Road Block Sitting Room (2/2) (Main Interlude)
Maneki Neko Sitting Room (3/3) (Revival)
Maneki Neko Sitting Room (3/3) (Main Interlude)
Booming Business Sitting Room (3/3) (Revival)
Booming Business Sitting Room (3/3) (Main Interlude)
Open Sitting Room (3/3) (Revival)
Open Sitting Room (3/3) (Main Interlude)
Paradise Sitting Room (3/3) (Revival)
Paradise Sitting Room (3/3) (Main Interlude)
Chained-Up Sitting Room (3/3) (Revival)
Chained-Up Sitting Room (3/3) (Main Interlude)
Headwind Sitting Room (3/3) (Revival)
Headwind Sitting Room (3/3) (Main Interlude)
Laid-Out Futon Sitting Room (3/3) (Revival)
Laid-Out Futon Sitting Room (3/3) (Main Interlude)
Deceptive Room (Revival)
Deceptive Room (Main Interlude)
Sitting Room Full of Floor Cushions (3/3) (Revival)
Sitting Room Full of Floor Cushions (3/3) (Main Interlude)
Sitting Room Full of Wardrobes (4/4) (Revival)
Sitting Room Full of Wardrobes (4/4) (Main Interlude)
Safe Sitting Room (3/3) (Revival)
Safe Sitting Room (3/3) (Main Interlude)
Normal Sitting Room (3/3) (Revival)
Normal Sitting Room (3/3) (Main Interlude)
Lying Room (Revival)
Lying Room (Main Interlude)
Tango-no-Sekku Decoration Sitting Room (3/3) (Revival)
Tango-no-Sekku Decoration Sitting Room (3/3) (Main Interlude)
Sitting Room That Looks Like Walls (3/3) (Revival)
Sitting Room That Looks Like Walls (3/3) (Main Interlude)
Pumpkin-Patterned Sitting Room (7/7) (Revival)
Pumpkin-Patterned Sitting Room (7/7) (Main Interlude)
Bumper Crop Sitting Room (2/2) (Revival)
Bumper Crop Sitting Room (2/2) (Main Interlude)
Iron Door Sitting Room (4/4) (Revival)
Iron Door Sitting Room (4/4) (Main Interlude)
Revival: Tokugawa Kaiten Labyrinth - 3rd Floor
Quest
Procuring Tools: Perpetually Dark Room (Underground) (Revival)
Act Four: Remedy for Intoxication, Part One (Revival)
Act Four: Remedy for Intoxication, Part Two (Main Interlude)
Act Four: Remedy for Intoxication, Part Two (Revival)
Act Four: Remedy for Intoxication, Part Three (Revival)
Act Four: Remedy for Intoxication, Extra (Revival)
Giant Wandering Maidservant, and a Trifling Illusion (A) (Revival)
Giant Wandering Maidservant, and a Trifling Illusion (A) (Main Interlude)
Act Four: Remedy for Intoxication, Part Four (Revival)
Act Four: Remedy for Intoxication, Part Four (Main Interlude)
Ocean-Smelling Corridor (3/3) (Revival)
Ocean-Smelling Corridor (3/3) (Main Interlude)
Lightly Scented Corridor (3/3) (Revival)
Lightly Scented Corridor (3/3) (Main Interlude)
Dusk Room (Revival)
Dusk Room (Main Interlude)
Spaced-Out Corridor (3/3) (Revival)
Spaced-Out Corridor (3/3) (Main Interlude)
Drowsy Corridor (3/3) (Revival)
Drowsy Corridor (3/3) (Main Interlude)
Snuggly Corridor (3/3) (Revival)
Snuggly Corridor (3/3) (Main Interlude)
Blurry Vision Corridor (3/3) (Revival)
Blurry Vision Corridor (3/3) (Main Interlude)
Vacant-Eyed Corridor (4/4) (Revival)
Vacant-Eyed Corridor (4/4) (Main Interlude)
Twilight Room (2/2) (Revival)
Twilight Room (2/2) (Main Interlude)
Heartburn Corridor (3/3) (Revival)
Heartburn Corridor (3/3) (Main Interlude)
Squatting Corridor (3/3) (Revival)
Squatting Corridor (3/3) (Main Interlude)
Crawling Corridor (2/2) (Revival)
Crawling Corridor (2/2) (Main Interlude)
Might Faint Corridor (4/4) (Revival)
Might Faint Corridor (4/4) (Main Interlude)
Want To Dance Corridor (5/5) (Revival)
Want To Dance Corridor (5/5) (Main Interlude)
Vomit-Inducing Corridor (3/3) (Revival)
Vomit-Inducing Corridor (3/3) (Main Interlude)
Heavy-Heart Corridor (2/2) (Revival)
Heavy-Heart Corridor (2/2) (Main Interlude)
Shinonome Room (Revival)
Shinonome Room (Main Interlude)
Foment Corridor (3/3) (Revival)
Foment Corridor (3/3) (Main Interlude)
Enlightenment Corridor (3/3) (Revival)
Enlightenment Corridor (3/3) (Main Interlude)
Amnesia Corridor (2/2) (Main Interlude)
Amnesia Corridor (2/2) (Revival)
Awakened Sixth Sense Corridor (2/2) (Revival)
Awakened Sixth Sense Corridor (2/2) (Main Interlude)
Perpetually Dark Room (2/2) (Revival)
Perpetually Dark Room (2/2) (Main Interlude)
Revival: Tokugawa Kaiten Labyrinth - 4th Floor
Quest
Procuring Tools: Bird of Paradise Room (Underground) (Revival)
Act Five: Key To Steal, Part One (Revival)
Act Five: Key To Steal, Part Two (Main Interlude)
Act Five: Key To Steal, Part Two (Revival)
Act Five: Key To Steal, Extra (Revival)
Giant Wandering Maidservant, and a Trifling Illusion (B) (Revival)
Giant Wandering Maidservant, and a Trifling Illusion (B) (Main Interlude)
? ? ? (Revival)
Act Five: Key To Steal, Part Three (Revival)
Act Five: Key To Steal, Part Three (Main Interlude)
Act Nine: The Final Tokugawa (Revival)
Act Nine: The Final Tokugawa (Main Interlude)
Unlocked Corridor (3/3) (Revival)
Unlocked Corridor (3/3) (Main Interlude)
Multiple Doors Corridor (3/3) (Revival)
Multiple Doors Corridor (3/3) (Main Interlude)
Corridor with Broken Door (3/3) (Revival)
Corridor with Broken Door (3/3) (Main Interlude)
Multiple Closed Corridor (Revival)
Multiple Closed Corridor (Main Interlude)
Corridor with Clocks (1/4) (Revival)
Corridor with Clocks (1/4) (Main Interlude)
Corridor with Bookshelves (1/3) (Revival)
Corridor with Bookshelves (1/3) (Main Interlude)
Room Buried in Books (2/2) (Revival)
Room Buried in Books (2/2) (Main Interlude)
Corridor with Rocks (3/3) (Revival)
Corridor with Rocks (3/3) (Main Interlude)
Corridor with Pictures (1/4) (Revival)
Corridor with Pictures (1/4) (Main Interlude)
Room Full of Boxes (3/6) (Revival)
Room Full of Boxes (3/6) (Main Interlude)
Corridor with Treasure Mark (3/3) (Revival)
Corridor with Treasure Mark (3/3) (Main Interlude)
Automatic Door Corridor (2/2) (Revival)
Automatic Door Corridor (2/2) (Main Interlude)
Boiling Pot Room (2/2) (Revival)
Boiling Pot Room (2/2) (Main Interlude)
Storage Room Corridor (3/7) (Revival)
Storage Room Corridor (3/7) (Main Interlude)
Storage Room Corridor (7/7) (Revival)
Storage Room Corridor (7/7) (Main Interlude)
Scribble Corridor (3/3) (Revival)
Scribble Corridor (3/3) (Main Interlude)
Prison Corridor (4/4) (Revival)
Prison Corridor (4/4) (Main Interlude)
Hawk Room (2/2) (Revival)
Hawk Room (2/2) (Main Interlude)
Offering Room (2/2) (Revival)
Offering Room (2/2) (Main Interlude)
Collapsed Corridor (1/3) (Revival)
Collapsed Corridor (1/3) (Main Interlude)
Slurry Corridor (5/5) (Revival)
Slurry Corridor (5/5) (Main Interlude)
Pet Concealing Corridor (2/2) (Revival)
Pet Concealing Corridor (2/2) (Main Interlude)
Snack Concealing Corridor (2/2) (Revival)
Snack Concealing Corridor (2/2) (Main Interlude)
Gold Concealing Corridor (2/2) (Revival)
Gold Concealing Corridor (2/2) (Main Interlude)
Antique Concealing Room (6/6) (Revival)
Antique Concealing Room (6/6) (Main Interlude)
Imports Concealing Corridor (2/2) (Revival)
Imports Concealing Corridor (2/2) (Main Interlude)
Revival: Tokugawa Kaiten Labyrinth - 5th Floor
Quest
Act Six: Myriad of Women, Part One (Revival)
Act Six: Myriad of Women, Part Two (Main Interlude)
Act Six: Myriad of Women, Part Two (Revival)
Act Six: Myriad of Women, Extra (Revival)
Act Six: Myriad of Women, Part Three (Main Interlude)
Act Six: Myriad of Women, Part Three (Revival)
Inflamed Room (3/3) (Revival)
Inflamed Room (3/3) (Main Interlude)
Seductive Corridor (3/3) (Revival)
Seductive Corridor (3/3) (Main Interlude)
Gooey Room (3/3) (Revival)
Gooey Room (3/3) (Main Interlude)
Charming Corridor (3/3) (Revival)
Charming Corridor (3/3) (Main Interlude)
Room of Mystification (2/2) (Revival)
Room of Mystification (2/2) (Main Interlude)
Sweet Room (3/3) (Revival)
Sweet Room (3/3) (Main Interlude)
Impatient Corridor (3/3) (Revival)
Impatient Corridor (3/3) (Main Interlude)
Attractive Room (3/3) (Revival)
Attractive Room (3/3) (Main Interlude)
Blistered Corridor (4/4) (Revival)
Blistered Corridor (4/4) (Main Interlude)
Excited Corridor (2/2) (Revival)
Excited Corridor (2/2) (Main Interlude)
Shrinking Back Room (2/2) (Revival)
Shrinking Back Room (2/2) (Main Interlude)
Rendezvous Room (3/3) (Revival)
Rendezvous Room (3/3) (Main Interlude)
Alluring Corridor (4/4) (Revival)
Alluring Corridor (4/4) (Main Interlude)
Body Temp Room (3/3) (Revival)
Body Temp Room (3/3) (Main Interlude)
Consumed with Passion Corridor (3/3) (Revival)
Consumed with Passion Corridor (3/3) (Main Interlude)
Moody Room (3/3) (Revival)
Moody Room (3/3) (Main Interlude)
Bursting Room (2/2) (Revival)
Bursting Room (2/2) (Main Interlude)
Room That Crosses the Line (2/2) (Revival)
Room That Crosses the Line (2/2) (Main Interlude)
Corridor to Mature (2/2) (Revival)
Corridor to Mature (2/2) (Main Interlude)
Locking Eyes Room (2/2) (Revival)
Locking Eyes Room (2/2) (Main Interlude)
Suggestive Room (2/2) (Revival)
Suggestive Room (2/2) (Main Interlude)
Lustrous Room (2/2) (Revival)
Lustrous Room (2/2) (Main Interlude)
Night-Blooming Cereus Room (2/2) (Main Interlude)
Night-Blooming Cereus Room (2/2) (Revival)
Bashful Corridor (2/2) (Main Interlude)
Bashful Corridor (2/2) (Revival)
Revival: Tokugawa Kaiten Labyrinth - 6th Floor
Quest
Act Seven: God of Love (1/4) (Main Interlude)
Act Seven: God of Love (1/4) (Revival)
Act Seven: God of Love (2/4) (Revival)
Act Seven: God of Love (3/4) (Revival)
Act Seven: God of Love (3/4) (Main Interlude)
Act Seven: God of Love (4/4) (Revival)
Act Ten: Ooku, Part One (1/5) (Revival)
Act Ten: Ooku, Part One (1/5) (Main Interlude)
Act Ten: Ooku, Part One (2/5) (Revival)
Act Ten: Ooku, Part One (3/5) (Revival)
Act Ten: Ooku, Part One (4/5) (Revival)
Act Ten: Ooku, Part One (5/5) (Revival)
Act Ten: Ooku, Part Two (1/2) - 75-99% Tokugawafication Gauge (Main Interlude)
Act Ten: Ooku, Part Two (1/2) - 50-74% Tokugawafication Gauge (Main Interlude)
Act Ten: Ooku, Part Two (1/2) - 100% Tokugawafication Gauge (Revival)
Act Ten: Ooku, Part Two (1/2) - 25-49% Tokugawafication Gauge (Main Interlude)
Act Ten: Ooku, Part Two (1/2) - 75-99% Tokugawafication Gauge (Revival)
Act Ten: Ooku, Part Two (1/2) - 1-24% Tokugawafication Gauge (Main Interlude)
Act Ten: Ooku, Part Two (1/2) - 50-74% Tokugawafication Gauge (Revival)
Act Ten: Ooku, Part Two (1/2) - 0% Tokugawafication Gauge (Main Interlude)
Act Ten: Ooku, Part Two (1/2) - 25-49% Tokugawafication Gauge (Revival)
Act Ten: Ooku, Part Two (1/2) - 1-24% Tokugawafication Gauge (Revival)
Act Ten: Ooku, Part Two (1/2) - 0% Tokugawafication Gauge (Revival)
Act Ten: Ooku, Part Two (1/2) - 100% Tokugawafication Gauge (Main Interlude)
Act Ten: Ooku, Part Two (2/2) (Revival)
Servant Summer Camp 2022