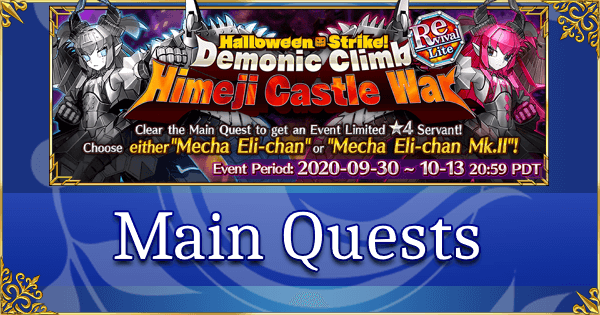
Introduction
- This is the optimized "Speedrun" walkthrough from the original run, which should be possible for all Masters including first-timers, as many Friend Supports will have Max Limit Broken CEs from the prior run.
- No gacha CEs are required for this guide apart from the free CE given at the start.
- Instead, this walkthrough relies completely on being able to borrow a Max Limit Broken (MLB) Spawn Bonus CE from your friends.
- Simply follow the CE recommendations in the guide, and everything should be fine.
- Full completion using this guide requires 2130 AP to 2190 AP, and a lot fewer total runs.
- To access all of Mecha Eli's Ascension Materials and copies, Masters must complete the Main Quest and at least 90 missions.
- Masters progress through the event by completing Missions that open up new Free Quests as they ascend their way across the humble abodes of Halloween.
- Masters are expected to use their currency to buy Spawn Bonus CEs of their own to help out with the clear speed (and later, better farming).
- Masters should be able to finish the event with natural AP if starting at the beginning of the event period.
Part 1A (Ch 1 - 6)
- Note: Masters who roll the gacha can access additional Spawn Bonus a bit earlier.
- Note: The first listed CE is always the main recommendation and typically has the highest bonus/Spawn Bonus benefit!
Tip: Above each step is a blue accordion/header, clicking on any of these will give additional information and some helpful context why we run certain quests.
W-Wait a second! Why are we here?

Because Meliran migrated to Gamepress, that's why.

That sellout!

Oh, shush! We still have a guide to make here!
Make me!
Um, while they're arguing... go run chapter 1.
| Step | Quest | Notes | Enemy Spawns |
| 1 | Chapter 1 |
For ALL Main Quests, Spawn Bonus simply does not work. Furthermore, most, if not all, Main Quests have forced supports. Equip any Drops: |
| 2 | Chapter 2 |
Scrap the robot to unlock the first Free Quest and a |
| Next Mission Objective: | 23: Defeat [03/06] Pumpkin Knights | ||
| 3 | Guest Room |
Complete once! Borrow an MLB Other CEs: Drops: |
|
| Mission Objective Complete: | 23: Defeat [07/06] Pumpkin Knights | ||
| 4 | Section 3 |
Carmilla heals for 1000 HP/turn. Equip Drops: |
| Next Mission Objective: | 28: Defeat [00/08] Scarecrows | ||
| 5 | Attendants' Room |
Complete 2x! Borrow an MLB Other CEs: Drops: |
|
| Mission Objective Complete: | 28: Defeat [12/08] Scarecrows | ||
| Next Mission Objective: | 10: Defeat [14/25] Pumpkin enemies | ||
| 6 | Prayer Room |
Complete 3x! Borrow an MLB Other CEs: Drops: |
|
| Mission Objective Complete: | 10: Defeat [27/25] Pumpkin enemies | ||
| 7 | Section 4 |
Equip Drops: |
| Next Mission Objective: | 36: Defeat [08/20] Homunculus | ||
| 8 | Soldiers' Corridor |
Complete 2x! Borrow an MLB Other CEs: Drops: |
|
| Mission Objective Complete: | 36: Defeat [20/20] Homunculus | ||

| 9 | Section 5-1 |
Much like Chapter 2, this Mecha Eli is a Berserker. No Currency Drops. |
|
| 10 | Section 5-2 |
This time, Mecha Eli has a Break Bar. After Break, she buffs herself permanently with Critical Damage Up and Sure Hit. No Currency Drops |
| 11 | Section 6 |
Each Turn, the team receives 500 damage. She hits pretty hard, but the fight ends after 5-6 turns. No Currency Drops. |
| 12 | Great East Pillar |
Complete once! Borrow an MLB Other CEs: Drops: |
Part 2A (Ch 7 - 12) [Unlocks 10/2/2020 21:00 PST]
| Step | Quest | Notes | Enemy Spawns |
| 13 | Section 7 |
Reminder: Main Quests are unaffected by Spawn Bonus. Berserker of El Dorado has a Break Bar Equip Drops: |
| Next Mission Objective: | 21: Defeat [00/20] Metal Skeletons | ||
| 14 | Castle Gate |
Run this 4x! Borrow an MLB Other CEs: Drops: |
|
| Mission Objective Complete: | 21: Defeat [48/20] Metal Skeletons | ||
| 15 | Larder |
Run this once! Borrow an MLB Other CEs: Drops: |
|
| Masters with no gacha CEs should have 300+ Equip it for nodes that feature: |
|||
| Mission Objective Complete: | 14: Defeat [47/30] Mech enemies | ||
| 16 | Section 8 |
Equip Drops: |
|
| Mission Objective Complete: | 75: Clear Clear [10/10] Csejte Castle Quests Edit: This location actually has not opened up yet. Not to worry though, it can be run after the Siegfried quest as well. It should not affect progress. |
||
| 17 | Watchtower |
Run this once! Borrow an MLB Other CEs: Drops: |
|
| Next Mission Objective: | 65-66: Defeat [07/15] Evil Servants | ||
| Mission Objective Complete: | 95: Clear [10+/10] Missions | ||
| 18 | Great Staircase |
Clear this once! Borrow an Other CEs: Drops: |
|
| Mission Objective Complete: | 46: Clear [68-76/50] Demonic enemies | ||
| 19 | Double Doors |
Complete this once! Borrow an MLB CEs: Drops: |
Next Mission Objective: | 62: Defeat [07/10] Chaotic Servants |
| 20 | Attendants' Room |
Complete 6x! Borrow an MLB Other CEs: Drops: |
Note: The Great Corridor quest is now available, but we'll be skipping it until way later! |
| Mission Objective Complete: | 62: Defeat [13/10] Chaotic Servants | ||
| 21 | Armory |
Complete once! Borrow an MLB Other CEs: Drops: |
|
| Mission Objective Complete: | 56: Defeat [13/10 Berserker Servants | ||
| Next Mission Objective: | 37-38: Defeat [44/80] Homunculus |
||
| 22 | High Windows |
Clear this 3x! Equip and borrow Other CEs: Drops: |
|
| Mission Objective Complete: | 38: Defeat [80/80] Homunculus | ||
| Mission Objective Complete: | 77: Clear [11/10] Quests in Himeji Castle | ||
| Mission 77 rewarded a copy of Equip it for nodes that feature: |
|||
| 23 | Great West Pillar |
Complete this once! Borrow an MLB Other CEs: Drops: |
|
| Mission Objective Complete: | 19: Defeat [64-72/60] Pumpkin Skeletons | ||
| 24 | Ambush Point |
Run this once! Borrow an MLB Other CEs: Drops: |
|
| Masters with no gacha CEs should have another 300+ Equip it for nodes that feature: |
|||
| Mission Objective Complete: | 66: Defeat [18/15] Evil Servants | ||
| Mission Objective Complete: | 96: Clear [30+/30] Missions | ||
| Mission 96 rewarded a copy of Equip it for nodes that feature: |
|||
| Next Mission Objective: | 60-61: Defeat [7/15] Divine Servants | ||
| 25 | Ventilation Shaft |
Run this 2x! Borrow an MLB Other CEs: Drops: |
|
| Masters with no gacha CEs should have their first 300x Equip it for nodes that feature: |
|||
| Mission Objective Complete: | 33: Defeat [26/25] Drones | ||
| 26 | Section 9 |
Cleopatra has a Break Bar Equip Drops: |
|
| 27 | Ventilation Shaft |
Run this 5x!Borrow an MLB Other CEs: Drops: |
|
| Mission Objective Complete: | 60: Defeat [15/15] Divine Servants | ||
| Mission Objective Complete: | 16: Defeat [~138/120] Mecha enemies | ||
| Mission 16 rewarded a copy of Equip it for nodes that feature: |
|||
| 28 | Stone Drop Window |
Run this 7x! Borrow/Equip an MLB Other CEs: Drops: |
|
| Mission 72 rewarded a copy of Equip it for nodes that feature: |
|||
| Mission 50 rewarded a copy of Equip it for nodes that feature: |
|||
| Mission Objective Complete: | 32: Defeat [80+/80] Metal Scarecrows | ||
| Mission Objective Complete: | 76: Clear [10+/10] Pyramid Quests | ||
| 29 | Great Corridor |
Clear this 5x Borrow an MLB Other CEs: Drops: |
Mission Objective Complete: | 53: Defeat [13/10] Rider Servants |
| Masters with no gacha CEs should have their second 300x Equip it for nodes that feature: |
|||
| Next Mission Objective: | 39: Defeat [05/30] Automata | ||
| 30 | Hidden Corridor |
Run this 4x! Borrow an MLB Other CEs: Drops: |
|
| Mission Objective Complete: | 39: Defeat [53/30] Automata | ||
| Next Mission Objective: | 26: Defeat [17/45] metal Pumpkin Knights | ||
| 31 | Lookout Post |
Run this 4x! Borrow an MLB Other CEs: Drops: |
|
| Mission Objective Complete: | 26: Defeat [49/45] Metal Knights | ||
| 32 | Section 10 |
Equip Drops: |
|
| 33 | Section 11 |
Equip Drops: |
|
| Masters with no gacha CEs should have 300+ Equip it for nodes that feature: |
|||
| Mission Objective Complete: | 97: Clear [65+/50] Missions | ||
| 34 | Section 12 |
No Currency drops. On break, reduces damage taken and Osakabehime stuns herself for 1 turn. |
Part 2B (Ch 13 - End)
| Step | Quest | Notes | Enemy Spawns |
| Mission Objective Complete: | 17: Defeat [280+/280] Mecha enemies | ||
| 35 | Section 13 |
Equip Drops: |
|
| 36 | Section 14-1 |
Ruler-class enemy, after Break, increases Critical Hit Chance and Critical Damage. 500 passive damage/turn from the Quest Location. |
|
| 36 - 2 | Section 14-2 |
Another Ruler-class fight. 3 HP Bars (2 Break Bars). Gains Pierce Invincibility after first Break and after second Break gains a massive stack of NP Damage. 500 Damage/turn still in effect, but now also reduces Defense for 3 turns. Fortunately, every turn team is buffed with NP Gain and Attack Up. |
| 37 | Section 15 |
Story Node |


| 38 - 1 | Mecha Eli-chan Selection Quest (1/2) |
Equip Drops: |
|
| 38 - 2 | Mecha Eli-chan Selection Quest (2/2) |
Equip Drops: |
|
| Masters can now exchange their They are identical gameplay-wise, so make sure to choose the voice/aesthetic of your preference. If this is the second time through the event, grab the other version for the chance for a larger Mecha Eli-chan army and more Bond Saint Quartz! |
|||
Additional Free Quests
| Step | Quest | Notes | Enemy Spawns |
| Mission Objective Complete: | 64: Defeat [20/20] Chaotic Servants | ||
| Make sure to bring (and also level) either Missions 92-94 require quest participation and Bond Points! | |||
| 39 | Right Shachi |
Run this once! This is the best Silver Currency farming location. Equip Other/borrowed CEs: Drops: |
|
| Mission Objective Complete: | 41: Defeat [80+/80] Automata | ||
| Mission 41 rewarded a copy of Equip it for nodes that feature: |
|||
| Mission Objective Complete: | 98: Clear [70+/70] Missions | ||
| 40 | Treasury |
Run this twice! We need an extra Super Giant kill and 8 Metal Skeletons. Equip/borrow Other CEs: Drops: |
|
| Mission Objective Complete: | 81: Clear all Castle Csejte Quests | ||
| Mission 81 rewarded a copy of Equip it for nodes that feature: |
|||
| Next Mission Objective: | 48: Defeat [11/20] Super Giant enemies | ||
| 41 | Old Well |
Run this 3x! This is the best node to farm gold currency (as its other drops are also impressive). Equip Other/borrowed CEs: Drops: |
|
| 42A | Old Well |
Run this 6x! For a cheaper (but far less currency), see route B. Equip Other/borrowed CEs: Drops: |
|
| 42B | Great East Pillar |
Or run this 6x! Borrow an MLB Other CEs: Drops: |
|
| Masters with no gacha CEs should have 300+ Equip it for nodes that feature: |
|||
| Mission Objective Complete: | 48: Defeat [20/20] Super Giant enemies | ||
| Mission Objective Complete: | 52 Defeat [20/20] Archer Servants | ||
| Mission Objective Complete: | 25: Clear [120+/120] Pumpkin Knights | ||
| 43 | Left Shachi |
Run this once! Equip/borrow 100% Other/borrowed CEs: Drops: |
| 44 | Great Chidori Gable |
Run this once! Equip/borrow Other CEs: Drops: |
|
| Mission Objective Complete: | 43: Defeat [20/20] Gazers | ||
| Next Mission Objective: | 22: Defeat [72/80] Metal Skeletons | ||
| 45 | Burial Chamber |
Run this once! This is the best Bronze Currency node. Equip Other (Borrowed) CEs: Drops: |
|
| Mission Objective Complete: | 22: Defeat [80+/80] Metal Skeletons | ||
| Mission Objective Complete: | 55: Defeat [20/20] Rider Servants | ||
| Mission Objective Complete: | 20: Defeat [120+/120] Pumpkin Skeletons | ||
| Mission Objective Complete: | 82: Clear all Pyramid quests | ||
| Mission 82 rewarded a copy of Equip it for nodes that feature: |
|||
| 46 | Gable Room |
Run this once! Equip/borrow Other CEs: Drops: |
|
| Mission Objective Complete: | 58: Defeat [20/20] Berserker Servants | ||
| Mission Objective Complete: | 83: Clear all Himeji Castle quests | ||
| Mission 83 rewarded a copy of Equip it for nodes that feature: |
|||
| Next Mission Objective: | 45: Defeat [12/60] Mass-Production MK. IIs | ||
| 47 | Underground Factory |
Clear this 3x! Drops a lot of Gold Currency, but its other drops are only okay. Equip Other/borrowed CEs: Drops: |
|
| Mission Objective Complete: | 45: Defeat [60+/60] Mass-Production MK. IIs | ||
| And that's 100/100 Missions completed! If any mission is not yet complete, please visit the enemy locator for the best enemy location. Otherwise, the Ozymandias/Medb/Tesla nodes are ideal farming locations. | |||